Wednesday, November 2, 2011

Age Old Cure For Cauliflower Ear: Cauli Soup


I'm big on what I consider "essence" soups...derived from few ingredients, intended to let the natural flavor of the primary element shine through.  When designed around vegetables, it usually means cooking with dry heat to concentrate flavors, then liquefying with mild vegetable stock, and pureeing to finish so as to give the impression of a cream without actually adding any dairy. 

In this recipe it's the mild but distinct flavor of cauliflower, with a small amount of potato added for body, along with an apple thrown in for a just discernible touch of sweetness.  Whereas you could take it to another level with some spices reminiscent of faraway lands, or some actual cream, I like the close-to-the-earth simplicity of this method.  I do often garnish such soups with some game changer though, like polenta croutons with squash soup, and in this case I used some American bacon.  It obviously tastes good, but I suggest having a light hand with it, otherwise the abundant flavor will mute the delicate cauli it's really all about.  Try some nice crusty bread though since this is a full bodied recipe and requires some zopping.  You'll probably find the consistency is quite hearty per this recipe, so it can easily double as a sauce served with a protein for a complete meal.        
  
Ingredients:
2 medium heads cauliflower
1 onion
1 apple (granny smith or something good for baking)
1 lb. potatoes
3-4 sprigs fresh thyme
About 2 liters vegetable stock, recipe follows
Extra virgin olive oil
Salt and pepper to taste
Optional: 1/2 lb. bacon, cooked and roughly chopped
Preheat the oven to 400 F.  Heat the vegetable stock to a simmer in a pot.

Trim the green stalks and leaves off the cauliflower, then roughly chop the florets and hearts into pieces and place in a large mixing bowl big enough for it, the onion and the apple.  Cut the onion into segments and add to the bowl, along with the apple, peeled, cored and roughly cut into segments.

 Toss in a bowl with enough olive oil to coat and salt and pepper to taste.  Turn out onto baking sheet(s) in an even layer without overcrowding, and cook in the oven 30 minutes, until the edges of the cauliflower are brown and everything is tender.

Peel the potatoes and cut into 1/2" dice.  Heat olive oil to coat the bottom of a medium or large saucepan over medium high heat.  When the oil shimmers, add the potatoes and 1/2 the thyme leaves, and let cook a couple minutes to release the fragrance of the thyme. 

Add the ingredients from the baking sheets and then begin ladling stock to just cover everything.  Cook about 10 minutes at a gentle boil, or until the potatoes are tender.  
Transfer everything to a blender, in batches if necessary, and puree, adding stock as needed to achieve the desired consistency.  Season to taste with salt and pepper.  Return the puree to the saucepan and heat through.  Serve with some fresh thyme leaves for garnish, some crusty bread and/or pieces of bacon.

Vegetable Stock:
1 onion, peeled and quartered
2 ribs celery, cut into a couple pieces each
2 carrots, peeled and cut into a couple pieces each
A few whole peppercorns
Salt to taste

Place the vegetables and peppercorns in a large pot and fill almost to the rim with water. Bring just to a boil, then lower to a gentle simmer. Let it cook an hour, more if you'd like, then season to taste with salt. Can be stored several weeks in a refrigerator or several months in a freezer.
Wednesday, October 26, 2011

Autumnal Sunday Dinner: Pork Shoulder Porchettata


I know it seems like whenever I propose a meat dish, it's something involving pork shoulder.  But I don't think I'm getting repetitive yet, so I'll keep going.  I'll take slow cooked pork cuts like belly and shoulder over a beef steak six days out of seven.  In so doing I pay $4.99 to $6.99 a pound or so instead of $15.99 to $19.99 a pound to feed myself and others, and enjoy the layers of flavor from slow cooking.  I actually worry now that "lesser cuts" like pork belly and shoulder and beef short ribs are becoming the in meats such that their prices will skyrocket as consumers demand more of them and leave loins and steaks on the shelves.  We'll see.

I've already gone into what porchetta means to me and along that train of thought this is a dish that feels right in the first chills of Autumn...aromatically roasted meat, vegetables cooked underneath so as to gather the drippings and obtain wonderfully browned edges.  "Porchettata" meaning in the way of porchetta, involving fennel and garlic.  I threw in some grapes to this recipe, befitting harvest time in wine countries everywhere, and cooked with the whole they added a welcome sweetness and acidity to the sauce derived from the bottom of the pan.  The sauce is the culmination of the roasted vegetables and what they catch from the meat as it oozes fat and juices that carry the seasonings with them.  

For the Meat:
1 4 lb. pork shoulder, butterflied by your butcher if possible, otherwise directions below
1 teaspoon fennel pollen or fennel seeds
1 teaspoon black pepper corns
1 teaspoon coriander seeds
2 medium cloves garlic
2 sprigs rosemary
1 tablespoon salt
1-2 tablespoons white wine
Baker's twine

For the Vegetables/Sauce:
2 onions, peeled and cut into eighths
2 lbs. carrots, peeled and cut into 2 inch segments
1 lb. celery, cut into 2 inch segments
2 lbs. potatoes - fingerling, red, yukons, whichever you prefer for roasting, partially peeled and cut into pieces equivalent to the other vegetables
1 lb. grapes, preferably seedless - can be wine grapes or table grapes
2 sprigs of rosemary
2 cups or so stock, plus another 2 or so for the sauce (recipe for veg stock below, or use a good meat stock, homemade if possible!)
1 cup or so white wine
Extra Virgin Olive Oil
Salt and pepper to taste

To butterfly the meat yourself, get a very sharp knife, preferably one for filleting, and make an incision about an inch above the surface you're cutting on from one end of the piece of meat to the other, about an inch deep.  You want to basically unfurl this hunk of meat into a slab, so continue to slice across the piece of meat from that first cut while pulling the rest away from you as you'd unroll a rug.  What you should end up with is a rectangular slab of meat, roughly an inch thickness at every part.  It's ok if there are areas thicker or thinner, even some holes are fine.  You can pound the meat if you'd like to make it more uniform and/or tenderize, but it's not imperative.

Make the paste by grinding the rest of the meat ingredients except the wine in a spice grinder.  Then
mix in a bowl with the wine to form a
rough paste.  Take the paste and smear it all over the surface of the meat, covering as much as possible.

No need to massage or really work it in, although you could and let it marinate overnight.  Roll the meat up and tie off every couple inches with twine to secure it like a jelly roll.  Season the outside liberally with salt and pepper.

Preheat a convection oven to 275° F or a conventional oven to 300° F. 


Place the carrots, celery, onions, grapes and rosemary in the bottom of a deep and heavy roasting pan, season with salt and pepper, and toss with olive oil to coat.  Add enough stock and wine to cover the bottom of the pan and come maybe half way up the vegetables.  Place the meat on a rack suspended above the vegetables if possible.  Otherwise just rest it on top.

Roast in the oven 2-2 1/2 hours, then remove from the oven and add the potatoes, and a little stock if the pan is dry (it's ok if in the first couple hours the liquid evaporates and there's deep coloration, that'll be good for flavor and the sauce).  

Continue to cook another hour, then remove the meat from the pan (it should be nicely browned, fat cap crispy).  Tenting will take some crispiness away from the outside edges, but it's good if you're not serving the meat immediately.

Remove all the potatoes and some of the vegetables and grapes from the pan (enough to make a contorno for everyone).  Then place the roasting pan over a burner at medium high heat until the juices begin to sizzle.  Add some stock to deglaze, and using a spoon, loosen up all the browned bits stuck to the bottom and sides.

Transfer the contents to a blender and puree, adding stock to your preference to achieve the desired consistency.  Place back in a saucepan to heat through for serving. 

Slice the meat into half inch thick pieces and serve over a bed of puree, with the potatoes and vegetables on the side. 


Vegetable Stock:
1 onion, peeled and quartered
2 ribs celery, cut into a couple pieces each
2 carrots, peeled and cut into a couple pieces each
A few whole peppercorns
Salt to taste
Place the vegetables and peppercorns in a large pot and fill almost to the rim with water.  Bring just to a boil, then lower to a gentle simmer.  Let it cook an hour, more if you'd like, then season to taste with salt.  Can be stored several weeks in a refrigerator or several months in a freezer.
Friday, September 9, 2011

Stretching Leftovers Into Week Two (Maybe): Arancini


At the Zeoli household when risotto is made there are inevitable leftovers in significant quantity...even chipped away at for days afterward, a good portion remains.  Still perfectly serviceable, this aged food is often taken for granted, pushed further and further to the back of the fridge to may way for fresher things.  But there's a much better end to risotto's life cycle and it involves a pretty quick treatment, virtually reinventing and assuring it gets eaten quickly.

Arancini mean little oranges, so called because they are the shape, size and color of the fruit that drop from tress along sidewalks of many warm European cities...perhaps planted for the bonus effect of preventing scurvy among the gypsy population.  In Sicilian tradition they are filled with meat ragu and mozzarella.  In Rome they're called suppli, and more often than not shaped like croquettes, filled with prosciutto, mozz and peas.

I say maybe they'll last into week two in the title because breaded fried foods seem to trigger a human impulse to continue eating beyond normal satiation, so once made these may not last long at all.  So even though these are quite satisfying and not exactly light, I find that I can just keep eating them, knowing they don't get better than a minute or two out of the hot oil.

The batch of risotto which we used to make the balls pictured here was a simple one of grape tomatoes and mozzarella, basically a risotto "caprese".  Conveniently, the mozzarella was already there for us, and the tomatoes added a nice touch of sweet and tart to the end result.

Fried rice balls can really be made with any type of risotto I can think of, as long as, after sitting several hours or overnight, it becomes tight and easy to mold.  You can simply take the leftovers, form them and fry, or you can stuff them with new ingredients like melty cheese, meats, etc.  Even a seafood risotto would make for some good arancini, for instance.    

Not that there's a law I know of stating fried rice balls must be made from a batch of risotto previously consumed in original form...arancini can be the intended result from the beginning, just give the rice several hours in the fridge to firm up after initial cooking.  You can also do this with farrotto, or farro cooked in the method of risotto, for an earthier and healthier rendition.  

Ingredients:

A portion of risotto already made (at least 2 cups worth of leftovers I'd say)
Optional: favorite cheese to stuff the balls with, preferable one that melts well, as well as diced prosciutto, ham, bacon, etc. or leftover meat sauce
Bread Crumbs: for 2 cups of risotto, 1 cup bread crumbs and go from there
Eggs: for 2 cups of risotto, 2 eggs and go from there
1/2 to 1 liter oil for frying
Salt to taste

Take the risotto straight from the fridge and form into balls; the size of a clementine or small orange works well.  If you're stuffing them, take your finger and press into the ball, making an indentation in which to place stuffing, then close the ball up around it.  Dip the balls into the egg wash to coat, draining excess, then roll around in the bread crumbs.  Set aside on a sheet tray until all the risotto is used up.

Heat the oil in a heavy bottom pot to 375° F or until a small bit of the risotto sizzles and floats to the surface.  There should be enough oil to cover the balls by 2/3 at least.  Gently place the arancini in the oil, a few at a time so as not to overcrowd the pot, and fry, turning once or twice for even cooking, about 5 minutes overall.  Drain to a sheet pan with absorbent paper and season with salt.

Serve immediately and watch them disappear.

Friday, August 19, 2011

Time To Make The Pizzas


I've come to that point...I'm now dreaming in pizza.

The other night Nicole got up to drain her oft-filled bladder, and while she was in the bathroom I stood up and went over to the bureau, which instead of being a familiar piece of furniture I thought was the pizza oven in which I had a pie that needed tending to.  Cooking in about a minute and a half, you can never take your eyes off the oven for more than 30 seconds, so I was convinced I had to make a quick move to turn it before one side got overcooked.  Nicole asked me what I was doing and I momentarily regained some semblance of reality, but I couldn't put together coherent words to explain myself.  Still not completely out of my dream state and confused, I went back to bed and just passed out, the pizza of my dreams left in half baked limbo.  It's like when I worked at the Longshore Ice Rink in high school and would dream I was working the register and sit up at night in bed and think I owed someone change.  Nightmarish.

The restaurant is open 7 days per week now, lunch and dinner straight through from noon to close.  I don't work all those shifts, and most of us are down to 5 day work weeks at this point, but the day to day repetition and aggregate time spent there mean life revolves around the pies.  It's seemingly impossible to get more than a day or two ahead of demand in prepping our ingredients, so we're always working against the clock to fill our station with all the accouterments in time for service.

As in DMX's breakthrough album "It's Cold And Hell Is Hot", every day is a battle, but in the case of the pizza man, it's the oven that tries to control me.  After 5 weeks or so I've learned some of the nuances of the 850 degree monster, and to force it to do my bidding rather than the other way around, well, sometimes. Building and maintaining a proper fire is something, from what Mario (Mario LaPosta, the Chef de Cuisine and senior pizza man, not Batali) says, that pizzaiolos in Italy go on at length about, distinguishing it as a craft unto its own aside from the making of  the pizza. 

This week I began the next frontier in pizza making, though probably not the final one, of stretching pies as they call it.  Not just putting them in the oven and cooking them, but first taking the disks of dough from the tray and stretching/working them into edible canvases.  Time is of the essence on this learning course so as to make me look legitimate in full view of our patrons who can see all the action at the open pizza bar (I'm not quite there yet, but my examples are usually roughly circular).  And to also free up Mario and Ruben, both veteran pizzaioli, who have been working with almost no time off since July because they're the only ones who to this point know how to make pizza from start to finish.

The skill of it is something that undoubtedly takes a good amount of time to learn, but to execute the stretching is a process of only about 30 seconds (unless you're the guy in the Visa commercial who rolls it around his back and along his arms), and given our volume of business, I'm getting a lot of practice.  I don't think I'll be tossing it in the air any time soon and bedazzling diners, but I basically have to become proficient at it within a few days since we don't have rolling pins, nor do we have anywhere to hide our mistakes.      

World Pizza Championship here I come 2013 or so (Mario placed 8th overall in 2010).

Monday, August 15, 2011

Quick Dins: Sea Scallops Over Tomato Relish


Quick meal, nutritious, summery...just what's needed sometimes.  Sweet, tender scallops atop a fine dice of roasted plum tomatoes seasoned with the "aroma" of garlic but mainly left to their natural sweetness derived from dry heat.  This would probably work as well as an app or tapa as it does an entree, since it lacks a little bit of carb component, but you can get creative on that.  The tomatoes can be made a day in advance or so and probably improve for it.  Once you have them relished like this, you'll see they're good underneath or on top of a lot of things.    

Ingredients For 2

1 lb. sea scallops (little membranes on the sides removed if not done by fishmonger)
3 lbs. plum tomatoes
Extra virgin olive oil
3-4 cloves of garlic, smashed
2 tablespoons white wine
2 tablespoons white wine vinegar
Salt and pepper to taste
Couple sprigs fresh thyme
Optional: aged balsamic for garnish
Basil to garnish

Preheat an oven to 350.  Slice the tomatoes in half, then remove the seeds and inner flesh.  Place all the scooped out halves in a mixing bowl, and toss with the thyme sprigs, wine, vinegar and enough olive oil to coat nicely. Season to taste with salt and pepper.  Drizzle some olive oil on a couple large baking sheets, then place the tomatoes on, cut sides down.  Arrange the smashed garlic on the pans and bake for an hour.  Let them cool to room temperature once out of the oven, then remove the tomato skins, which should come off easily.


Dice the tomatoes finely and try to keep them uniform in size.

Season the scallops with salt and pepper.  Heat a frying pan over medium high to high heat and add just a little oil to coat the pan.  When it smokes, add the scallops in one even layer, not over crowding the pan.  Cook in a couple batches if necessary.  Cook about two minutes per side, until there is a nice brown crust on each, and they turn from translucent to opaque.

Serve the scallops over the relish with some basil leaves and a conservative drizzle of extra virgin olive oil and aged balsamic if you like.

Tuesday, July 26, 2011

A Tale of One City, Two Areperas


After a long week of work, I had yesterday off from TL and decided to go out and taste some different food.  I've been to Valencia Luncheria before, but strangely never had their arepas or empanadas, two things foodwise Venezuela is best known for.  Valencia for a while was of the highest rated eating establishments in the Norwalk/Westport/Fairfield area with a 27 for food, so someone must have really liked it.  The tiny place is always crowded, especially around lunchtime.  A 15 minute wait for simple fried takeout  isn't surprising.  I opted for carne mechada in my arepa (typical Venezuelan slow cooked and shredded beef) and an empanada with black beans and cheese, no crazy flavor combo but bound to be good.  $7 plus change for both, and a satisfying and energy boosting lunch was mine.

First up I tasted the empanada...the dough, more sweet than savory, was thin and not too oily, just a bit of crunch and then into the hot interior of molten queso blanco and black beans with that signature Latin flavor of cumin, garlic and stock they're cooked in.  The beans weren't mushy, but starchy and firm enough to stand up to the heat, the cheese more there for texture than salinity.

The arepa was not quite as hot, with just a thin outer crust of the corn pocket providing the crunch, the rest of it mild without much salt and just simple corn flavor. It was not overstuffed with carne, just enough without it unfolding into a complete mess. The beef was very nicely cooked, very moist, tender and well shredded.  The flavors were simple and homey, like a good pot roast done with Venezuelan spices.  To dip was a bold chipotle sauce, spicy and smoky, and a pleasantly sour tomatillo salsa with always refreshing cilantro.  I probably could have eaten all of both, but my stomach was actually telling me when I was half done with each that I was satisfied.  My appetite has shrunk considerably in the 2+ weeks working in the restaurant.  Not that it should be taken as anything's wrong with the food...we're not stretching the meat sauce by adding ground thyroid glands or engaging in any unsanitary practices.  Just that smelling food all day decreases cravings and appetite, for me at least.        

Next stop, Westport Avenue and Masas Arepera for the same thing.  The stretch of Route 1 it's on is tough for new businesses...I've been going north and south through it as long as I remember, mentally cataloguing a fraction of the businesses located from the drive thru cleaners to Los Cabos, forgetting most of what's in between, until that one day every ten years I need to get a carpet cleaned.  I feel like people don't pull in on a whim to many of the tiny parking lots as they cruise by to take time checking out some of the small mom and pop type places.  Not a pedestrian-friendly area at all.  But that's America.  Some shops have surprisingly lasted years, but most of those who've opened in the last five are soon gone.  Remember Eno's Cheese Shop?  Yeah, that's what I thought.

Not that I wish anything but success for the people who decide to open up shop in the numerous and mostly tiny strip malls or whatever you'd call them.  Nicole and I always ponder though if the would-be entrepreneurs come from around here and know what the area is like...do they do their research?  If they do, do they think they're going to change the game and open a gem?  We all know the odds often thrown around on food establishments and their rates of success.  And lots of us have seen Kitchen Nightmares and other shows where you see what happens when people over-leverage.

I made the mile or so drive through that always congested crossroads of Norwalk and walking into Masas after Valencia was like night and day...despite it being twice the size, Masas was completely empty except for the couple of staff.  It's pretty new looking, with a blown up version of their menu on the wall, floor to the high ceiling to the left as you walk in, with pictures of a perro caliente and hamburguesa, among others, for visual aid.  Some items were curiously whited out with tape.  On the other side are huge photos showcasing the varied landscapes of Venezuela.

After ordering, as I waited I looked around to the other businesses in the area and noticed where there used to be a middle eastern joint was now a brand new Indian one.  Like I was saying...good luck, honestly.  I feel compelled to try it now.

Masas is slightly more expensive, but their arepa was definitely bigger than Valencia's.  Biting in to it, the meat was dryer and not as well shredded as Valencia's, and most importantly was significantly lacking in flavor.  Under-salted and devoid of that depth you should get from a good long cook with aromatics and spices.  The corn shell of the arepa was the right texture, for what it's worth.

The empanada was greasier than Valencia's, and the beans were mushier, again lacking their own distinct flavor.  Essentially just mushy brown/black stuff intermingled with melted white cheese.  Not terrible, but not memorable either.  I wanted to like it, wanted it to be good so I could say they really have something there.  But the feeling I got from the food was the feeling I got walking in; kind of indifferent, completely lacking the character and convivial vibe and commotion of Valencia.  They served one sauce with both my pockets, which seemed to be mayo based with some cilantro and a lot of garlic in it, nothing about it fresh or making for a particularly good condiment for either dish.

The same sentiment applied to Masas' location could be said of Valencia's, but in the case of the latter, they have become established as a gem within the strip mall landscape.  In this day and age of foodies and finding the next best thing wherever it may be, location and atmosphere aren't all that important.  In fact, sometimes less is more.  It's about good, distinct food.  If you ask a Venezuelan guy you know what he thinks of a place and he approves, it should be enough to keep it in business, considering how word travels (not that I asked anyone about Masas, but if I had a Venezuelan friend, I would have consulted them).  I didn't order up a huge sample from either place on my lunch journey, so to be fair maybe Masas' does have some redeeming dishes, but considering they call themselves an arepera, I don't think I can be blamed for not delving deeper.

Saturday, July 16, 2011

Tarry Lodge Westport Is Here


How do I know?  Well, after years of deliberating and many a conversation with people about ways to put my love of food and all things Italian to practical use after my stint in Italy, I took the plunge when offered the job working the pizza oven at the new Tarry Lodge in Westport, situated in the space formerly occupied by Bonda and Abbondanza. 

As of this Tuesday, July 18th, we're officially open for business.  The past week has been one of long hours of work prepping and testing the menu, as well as getting all the new staff oriented and ready to go.  Mario LaPosta, the perfectionist pizza maestro and guy who hired me, has been working particularly hard, but for months not weeks to get the place up and running, along with Executive chef Andy Nusser. 

As for me, it's been an interesting and memorable experience donning the chef's clothes (not a fan of baggy pants) to step back into the realm of cooking for strangers.  It's amazing how much you learn and the comfort level you achieve in a short span of time when you're working with food 10-12 hours a day.  I have a ways to go to master the beast of an oven we have at TL, optimal operating temp of about 850° F,  but the product promises to be good and comes closer to vera pizza napoletana than anything else I've seen around here.

If you know me reasonably well or have read my profile here, you make pick up on an element of fate in all this...after all, as I've said before, Mario "Battaglia" Batali was the reason I began cooking.  So when news came that he and business partner Joe Bastianich would be expanding their empire up I-95 into Fairfield County, it seemed like I had to take a shot considering things seemed to be coming full circle in a way. 

Anyway, I've got to get back to it, but I hope to have more to tell about the experience in the coming days...

Tuesday, June 28, 2011

Summery Corn Risotto with a Dash of Pancetta & Fennel


Why eat carbs with carbs, like rice with corn?  Or pizza with potato?  Because who's really counting if it tastes good?  Sweet corn, even local, is around early in the Summer now, and when it's good I walk an ever thinner line of under cooking so as not to mess with it, just something so I can say it's not completely raw.  Here it's just barely altered at the end of the risotto cooking process, staying crunchy and accented by the familiar flavor of butter, like the stick of which I used to roll ears in growing up.  

The addition of the sauteed fennel and pancetta is optional...what I like is that anise complexity of fennel quickly sauteed yet still sort of crunchy, and the porcine salinity of unsmoked pancetta.  I think they play well off the buttery, sweet corn and the creamy rice. 

You don't necessarily need a rich broth or stock with which to craft fine risotto, water itself is a perfectly good vehicle.  When I made this I had a rind of parm leftover, so I put it in my simmering water shortly before I began the risotto process, to good effect. 

2 cups Carnaroli, Vialone Nano or Arborio rice
1/2 cup dry white wine
2 ears of sweet corn, kernels cut off
1 head of fennel, medium diced
1/4 lb. pancetta, medium diced
1 liter water or stock
optional: Parmigiano Reggiano or Grana Padano rind to flavor broth
1 small onion, finely diced
Salt and Pepper to taste
3 tablespoons extra virgin olive oil, plus 2 for the pancetta and fennel
2-3 tablespoons butter cut into 1/2 inch or so cubes
Parmigiano Reggiano to taste
Handful of fresh parsley, roughly chopped

Bring the water (rind or not) or stock to a boil, then let it simmer.  Season, if need be, so it's very mildly salty. 

Heat 2 tablespoons of olive oil over medium heat in a saute pan, and add the pancetta while the pan is still heating up.  Allow the pancetta to render some of its fat and when it begins to brown, add the fennel and raise the heat to high.  Cook, tossing or mixing occasionally, for about 5 minutes or until the fennel has taken on some color and is soft but not mushy, and the pancetta slightly crispy.  Remove from heat and set aside. 

Heat the remaining olive oil over medium heat and when it shimmers add the onion, sweating for a couple minutes until translucent, then add the rice.  Cook it, stirring frequently, until it begins to brown ever so slightly, mindful not to let the onions burn.  At this point add the wine, letting it almost completely dissolve, then begin adding ladles of broth to just cover the rice.  Stir or shake the pan occasionally, adding more liquid when it looks like it needs it. 

Check for doneness at around 20 minutes, and assuming it's close, add the raw corn kernels to the risotto.  When the rice is pleasantly al dente, turn off the heat and stir the butter in.  Begin grating the Parmigiano in and taste it after a few tablespoons' worth to see if it's to your liking.  The risotto at this point should be creamy and not too dry.  Add a little broth if it seems too tight.  Season to taste with salt and pepper and add the parsley. 

Serve the risotto with some of the fennel and pancetta on top, allowing diners to mix it in themselves.  Serve with extra Parmigiano Reggiano to garnish.       

Tuesday, June 14, 2011

Cozy Latino-Med Fusion: Bella Pasta, SoNo


Situated right next to O'Neill's on the fringes of SoNo since November of last year, Bella Pasta recently held a Grand Opening to officially launch chef/owner Jose Rodriguez's Nuevo Latino and Mediterranean Fusion concept.

Born and raised in Riobamba, Ecuador, Jose owned a successful restaurant there in his early twenties before immigrating to New York City to broaden his culinary horizons.

After paying his dues on the line there he spent time in various European kitchens and then settled in Connecticut, where, with his two brothers, he's opened several successful Latin and Spanish restaurants, most recently Costa Brava of Norwalk.

During a brief chat with him to see how he would express this trend at Bella Pasta, Jose said "Nuevo Latino to me means no more rice and beans...there's nothing wrong with them, but we're aiming for better presentation and better flavors. In Ecuador we had a rich tradition of seafood from the Pacific, and my grandfather taught me to grow a variety of vegetables, so we truly ate farm to table...we even made our own cheese."

This latest permutation of his style and background is about representing Pan Latin cuisine as well as that of the Mediterranean on the same menu, fusing the many styles encompassed therein as he pleases. For instance, Jose told me "I love the flavor of Broccoli Rabe with sausage and pasta, but I use Spanish Chorizo instead of Italian Sausage because I think it works even better." A concept that is nuevo without raising too many eyebrows, and with such a vast repetoire Jose's interpretations can evolve to seemingly no end.

After a ribbon cutting ceremony with the Mayor of Norwalk, Richard Moccia, all the dignitaries in attendance like myself were welcomed to enjoy a sampling of Jose's typical and atypical dishes.

Looking at the spread spanning the bar, what immediately lured me in were the cold seafood plates...lemon cured Ceviche with clams, shrimp, whitefish and squid, perfectly and uniformly tender, with a bit of spice and the raw verve of fresh cilantro...the Mediterranean staple of Baccalรก with fresh tomato and briny olives...Mussels served in their shells surrounded by lemon juice and olive oil, a good bit of jalapeno complimenting rather than overpowering their flavor.

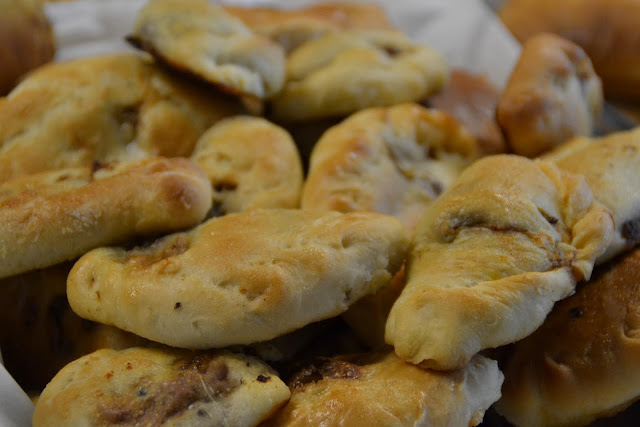
Ricotta filled Empanadas brought me back to a fond memory of fried calzones I once had...sweet, soft dairy warmed through in the quick fry of the buttery and salty dough.

To drink were multi-colored Sangrias from the bar; the red one I chose tasted of tropical fruit with bits of orange and apple mingling about. The super cas[ual] and simpรกtico atmosphere was evident in the little umbrellas propped in every glass.

The space is pretty open, with lacquered tables done up to look like Rioja, Malbec and other labels branded into wine crates. A little faux opening of a wood oven surrounded by stone faรงade caught my eye entering the dining room for the first time...perhaps for a more suitable feeling of warmth when the equatorial cuisines are a harder sell in CT’s winter months. Or maybe just a trick to get passers-by in since wood-burning ovens are all the rage nowadays. They have outdoor seating comprised of about half a dozen tables for two on the sidewalk in front.

The one pasta dish present was gluten-free Penne Salad featuring a mix of cauliflower, carrot and asparagus, simply blanched and left crispy, tossed with extra virgin olive oil.

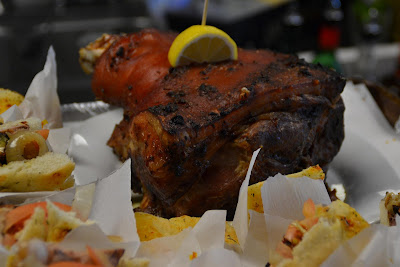
Another station I couldn't resist was centered around a slab of deep amber colored Pernรญl…crunchy skin and fat and all, resounding with whole pig flavor, layered between slices of Focaccia with caramelized onions and raw tomato. Somewhere between Cuban Sandwich and Panino...most importantly, nowhere to go but good.


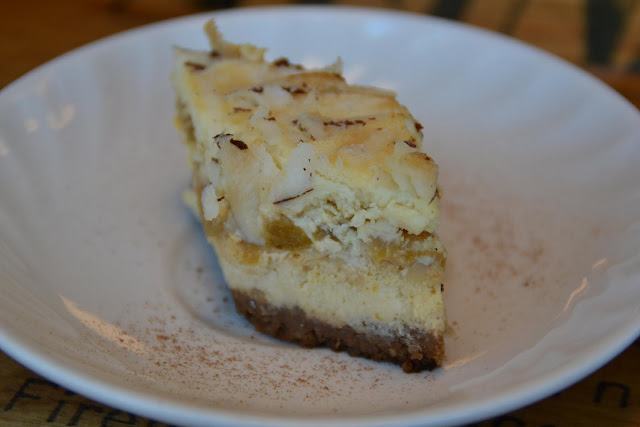
Even though it was only casual lunch on a weekday, being a drink or two and several small plates in, I'd have been remiss neglecting the desserts...chilled Peach Flan was custard perfection; smooth as can be and sitting in a pool of intensely sweet caramel syrup. Piรฑa Colada Cheesecake on the other hand was dense and salty/sweet with a thick and moist cookie crust, studded with crunchy bits of pineapple.


With refreshing drinks flowing and simple brightly flavored seafood dishes abounding at Bella Pasta, the mood was set for Summer. I'll be back to see what chef comes up with in the seasons and fusions ahead.


Bella Pasta is located at 91 North Main Street in Norwalk. Open for lunch and dinner daily.
(203) 853-6000

Tuesday, June 7, 2011

Fresh Tabouls & Chadrools: Tabouli Grill, Southport


Anyone who knows me doesn't necessarily know I flove North African and Middle Eastern food...bold spices, chickpeas, heat, fresh flavors of lemon, cilantro and parsley, olives and their oil, lots of fried things...

To say Middle Eastern Food generally refers to a genre too vast to be considered one cuisine, but I like lots of what I know from Morocco to Egypt to Lebanon to Turkey, and everything in between.  I've never been to that part of the world, nor am I an expert in it, but I do know that many of the dishes appear in variations on the same theme from country to country over a wide area.  Falafel, for instance, may be made with chickpeas only in one place, but with chickpeas and/or favas in another.  And the name may change by a few letters and punctuation marks too.      

Anyway, Fairfield already had a newcomer Turkish place and a Pan Mideastern with Syrian twist place, but recently added to them is Tabouli Grill, which is distinguished by its focus on freshly made and all natural, where possible, takes on the Lebanese, Israeli and Egyptian ways of eating.  Not one to espouse any border disputes though, it considers itself a Mediterranean restaurant. 

When we walked right in and snagged the last table for a kind of early dinner recently, they started us off with a tiny plate of pickled cucumbers and cabbage, which we sampled and used to whet our appetities and cleanse our cotton mouths after a trip to Homegoods, which always does that to me.   

Tabouli Grill has a liquor license so they offer wine by the glass and bottle, as well as specialty cocktails, but for me beer is the old reliable...if not the then one of the original libations of the world, brewed in the cradle of civilization itself, going with every cuisine I can think of. Plus, they didn't have any traditional malted fruit beverages on the menu, so...

The Tabouli appetizer was dry--in a good way...not swimming in lemon juice nor with too much rough parsley.  Just plenty of plump bulgur with a good but not overpowering mix of breath-assuring greenage and diced tomato. 

Their Hummus was delightfully fresh and smooth...not cold but not room temp either.  It had a distinct bitterness and nuttiness to it, with a well in the middle filled with lemony tahina sauce.  Nicole was on my case for a three day garlic breath bender courtesy of some really good Chicken Tikka Masala, but this hummus didn't send it over the edge.  The garlic was discernible, but in balance with everything else, which is what I look for.  Sorry Sabra. 

The pita served with it was excellent; doughy, floury, fluffy and tasting of honey.  Their pita to hummus ratio was heavily skewed toward the latter, and though I could just eat the puree with a fork, we needed seconds on the bread to properly finish, and they seemed happy to oblige. 

For dinner, the sliced lamb in the Shwarma Platter retained its natural flavor despite an abundant peppering of allspice.  It was also pretty lean but with the occasional bit of fat to keep it honest.  There's no vertical spit with cylinder of dripping meat to be seen at Tabouli, not that I would have minded, but theirs is an approach of freshness and clean flavors.  This lamb was apparently spit roasted, but it was less saturated with herbs, spices and salt than I'm used to in a Shwarma or Doner Kebab.   

Megadarra, or rice with lentils and caramelized onion was very light and well seasoned with cinnamon that played off the sweet onion.  Part of me initially wanted more salt, but then I realized that the use of spice was sufficient to talk me out of it.  I think in general we look for too much salinity, so this was one of those moments to resist the urge and taste it for what it was.   

The falafel, served with more of that zesty tahina, were good...it's hard to make your falafel really stand out from the crowd of other properly made falafel, so I can't say too much about them other than that they were deep golden brown and crunchy without being greasy.  I could easily order like a dozen or two and just snack on them as an appetizer, for what that's worth.  Which is something to me.

The handful of falafel were served with Israeli Salad, which had plenty of crunch courtesy of bits of cucumber and cabbage, tossed with a lemon dressing that worked off the the cukes to give the whole dish a a subtle pickled flavor. 

The small space of Tabouli is well staffed, which made service pretty swift. Probably not somewhere we'll go for an 8pm dinner and close down the place, but not takeout-focused with napkin dispensers either...a happy medium which means it's good for a casual and/or impromptu dinner.  I think we got lucky just strolling in when we did, because shortly thereafter a small line formed, and there's really nowhere to put it.  As we ate, passers-by pulled in to check out the menu and see what else they have to add to their list in the breakneck culinary revolution of the Post Road. 

Our experience was definitely positive, but with one small caveat: no Kibbeh...when I'm going for takeout, I'm wishing to see these fried levantine meatballs on the menu.  Personal preference though and maybe they'll add them at some point.  When it came to every other dish we were pleased by the freshness, balance of flavors and desired textures.  We'll have to look somewhere else for kibbeh, but I would come back here for everything else.

http://www.tabouligrill.com/

Chadrool: Neapolitan dialectical pronunciation of cetriolo, which means cucumber.  Often used as slang to call someone an idiot.  No idiots to be found here, but it rhymes with taboul and cucumbers were enjoyed during our dining experience.

Tuesday, May 31, 2011

Feeding The Legions


From what I read, farro preempted the strains of wheat we're familiar with for mass consumption in Roman Italy and the reaches of its empire.  The legions, properly nourished on this plump and chewy grain, were thus able to conquer many a foreign land.  Then somewhere down the road they started cultivating higher yielding strains of wheat, and we all know what happened after that.    

Artichokes are among my favorite vegetables to eat; I think maybe the work involved to get to the edible parts makes them more alluring to me.  It's hard to put my finger on exactly what it is about the flavor I find so pleasing, but I know part of the enjoyment is the texture...eaten raw and sliced thin they are bitter but fresh, and cooked through they are tender yet firm enough to cut with a knife, mellow but distinct.  

Baby artichokes are considerably less labor-intensive than mature ones because the leaves are not as fibrous to begin with, and the choke is not developed enough to be needly and bad for eating.  They also tend to be cheaper by weight.  The name though is misleading; these "babies" are full size when brought to market, just plucked lower on the plant than bigger ones.  

This recipe might sound minimal and lacking pizzazz to some...if so, you could add olives and/or some fresh herbs like mint or parsley to liven it up, but for me just the aroma of good olive oil hitting the still warm farro as I mix it in gets me...adding artichokes, crispy and salty on the outside while sweet and tender within, is abundantly pleasing for a meal or at least a side. 

2 lbs. baby artichokes, or equivalent in full size artichokes
16 oz. to 20 oz. Whole Farro
Hard, not too mild cheese like Pecorino Romano or Parmigiano Reggiano
3 to 4 tablespoons Extra Virgin Olive Oil, plus more to dress the farro
Juice of 2 lemons
3 cloves of garlic, smashed
Salt & pepper to taste
Hot pepper flakes to taste

Prepare the artichokes by peeling away the toughest outer layers of leaves...for mature artichokes this will require more work than baby artichokes, but they'll be tender enough when you reach the yellow/pale green layers.  Cut away the outer flesh of the heart and stalk if it is intact.  Then cut the artichoke in half, and if using mature ones, remove the thistles of the choke with a pairing knife or spoon.

Place the artichokes, cut side down, in a frying pan in one layer, along with the garlic, then add the olive oil and water to a depth of about a quarter inch and bring to a boil, covered.  When the water boils, remove the lid and let the water evaporate as it steams the artichokes.  Allow it to continue as the water disappears and the oil sizzles, browning and cooking the artichokes through.  Cook until they are golden and crispy on the outside.  Season to taste with salt and pepper.

You can choose to cook the farro per package instructions like a pilaf, but I just put it in a sauce pan and add cold water to cover by about 3 inches, then bring it to a boil (I don't pre-soak it either).  I cook it at a moderate boil and taste for doneness about 30 minutes after initially turning the heat on, not from when it began boiling.  I find it cooks in 30-40 minutes, start to finish.  A couple minutes before it's done to your liking, add salt to the water, letting the salt dissolve and get absorbed by the grain, then checking for taste.


Drain the farro in a colander and let sit a 5 to 10 minutes to cool somewhat.  Then place it in a serving bowl and add a few tablespoons at least of extra virgin olive oil.  Add the artichokes and the lemon juice, and season to taste the salad with salt, pepper, and hot pepper flakes, tossing to mix everything in.

Serve with shavings of cheese and another generous drizzle of extra virgin olive oil.

Thursday, May 26, 2011

Pulling The Pork One Way Or Another


I took it for granted that picnic roasts, or pork shoulders with the bone in were readily available these days, what with so many foodies about and bbq firmly established as an American pass time.  Maybe it's not until Memorial Day though that they start stocking them on supermarket shelves. So the Friday before our Pre-Memorial Day Weekend Party I was scrambling, and like Santa Clause in a blizzard on 12/23, thinking perhaps this year there would be no pulled pork for the party. 

But I went back to the friendly neighborhood butcher, who sold me on a couple nice pork shoulders instead.  Granted, no bones, and the sum of two of them equalled the tonnage I needed, but it's still pork, so how big a difference could it be?  The answer, I think, is not much.  I'm still going to look for the big hunk with the bone in the future, but in a pinch this will do. 

Although I admire those who have trailers the size of my house in which they smoke and slow cook meat for prize money, I don't believe there's much mystery to this dish at all.  What can be achieved at home and even in a conventional oven is a very good imitation if not a distinguished dish itself. 

The rub, which goes on in one layer, just enough for every millimeter of surface area usually, penetrates the meat overnight and more during cooking, caramelizing in the final hours and crusting up as fat is rendered out...the whole deal basically. The natural flavor of the pork comes out and it goes from tough to falling apart as connective tissue disintegrates.  From there very little is needed as the meat will remain quite moist despite the internal temperature going way beyond medium rare.   

I got me some "Bone Suckin' Sauce" from Stew Leonard's, and that became the dressing for my pork out of the oven.  I like it with a current of vinegar and tomato, then a good contrast of sweet and spice, and this one worked well.  It wasn't too thick or molasses dark, more fit for pouring and a rusty red color.   


So maybe the end product wouldn't stand up to a pitmaster's results after being smoked in his or her well seasoned apparatus...but this recipe is for the home cook with basic instruments, and you'll fool a lot of people who may well render effusive praise upon you for making this.    

So I encourage people to take up the very undemanding effort of getting yourself a big roast, and through the simple process (basically leaving it in an oven all day without touching it) you'll have an utterly succulent and crowd pleasing plethora or pork that seems so fitting for the outdoor party season.

Rub Ingredients:
1 tablespoon cumin, ground
1 tablespoon garlic powder
1 tablespoon chili powder
1 tablespoon cayenne pepper
1 tablespoon salt
1 tablespoon black pepper, ground
1/2 tablespoon pimentรณn (if using regular paprika, which is more bland, double it)
1/2 cup light brown sugar

Meat & Sandwich Ingredients:
1 7 lb. "picnic roast" or "Boston Butt" bone-in pork shoulder (substitute de-boned shoulder(s) if you can't find them with the bone intact)
16 oz. good, spicy barbecue sauce (preferably without high fructose corn syrup and with apple cider vinegar high on the list of ingredients)
Cole slaw, recipe follows
12 Potato buns

Mix the rub ingredients together in a bowl and set aside.  Rinse the meat with cold water and pat dry with paper towel.  Score the fat cap of the meat with a sharp knife in a broad cross hatch pattern, but don't cut below the fatty layer into the meat.  Take the dry rub and massage it into the meat sensually and with reverence, getting it on every part of the surface and into the crevasses that you scored with the knife.  Cover the meat with plastic wrap and refrigerate overnight.

The next day remove the meat from the fridge an hour before cooking.  Preheat the oven to 225° F with the rack in the middle bottom of the oven.  Put the meat in a roasting pan at least a couple inches deep.  When it's time, place the meat in the oven and let it cook, undisturbed, until the internal temperature reaches 200° F, which requires 1.5 to 2 hours per pound of meat.

When it's finished cooking, remove it from the oven and let sit uncovered for an hour prior to pulling.  If you plan on leaving it out longer, cover with foil.  When it comes time to pull, it might still be hot in the center, so beware.  You may also want rubber gloves, although the feeling of the tender, well lubricated meat between your fingers is an experience not lost on most people.  You can use two forks to do the pulling, but I find hands are still the best tools of the trade.

Remove the large pieces of fat that have not rendered out first and discard.  Then pull the meat into morsels fit for eating with a fork or on a sandwich.  Keep the crispy and crunchy ends intact--they have a nice concentrated flavor courtesy of the rub and pork wonder.  When the meat has been pulled sufficiently, mix in some barbecue sauce; enough to dress it without drowning it.  People can add more to theirs when it's served.


To make a sandwich, pile some of the meat on a potato bun and top it with coleslaw, pressing the top down over everything to make it a viable sandwich, and enjoy.         

Cole Slaw:
1 medium head of green cabbage (if the green cabbage is much larger than the purple, halve the green)
1 head purple cabbage
4 carrots
1 tablespoon celery seed
1/3 cup mayonnaise
1/2 cup sour cream
3-4 tablespoons white wine vinegar
2-3 tablespoons spicy mustard
Salt & Pepper to taste.

Shred the vegetables.  Mix all the ingredients together and then dress the vegetables.  This improves a lot if it's dressed several hours in advance and even refrigerated overnight.  Season to taste with salt and pepper before serving at room temperature or slightly below.   

Wednesday, May 11, 2011

Today We Have Disaronno On The Rocks With Breaded Chicken Thighs


You don't always have to go flour-egg-crumbs with a piece of meat or fitch...when frying it's necessary to glue the coating on, but if you're engaging in a less contact method like baking, oil alone will do to adhere the crumbs and seasoning to the protein and maintain moisture. 

For instance...some well-aged bread, hard as can be, I think, processed to little crumbs, seasoned with fresh oregano, salt and pepper.  I used boneless chicken thighs because, although breasts pounded out are just fine, thighs pounded out can be even better.  

It's worth using good oil...maybe not your best EVOO, but something you like the taste of.  It's quick, less messy than frying, and you're left with less lipid overall.  I did spritz the pieces with my olive oil mister just out of the oven to ensure they glistened and were abundantly moist, which they were.  We enjoyed it beside a crisp endive salad with bell pepper, picholine olives and chickpeas. This method works great on a firm white fish too.     

Serves 2

Ingredients:
1 lb. boneless, skinless chicken thighs
1/2 loaf rustic bread, several days old and very hard
1/2 cup extra virgin olive oil
Handful fresh herb of choice (oregano, basil, thyme, etc. or a mixture), finely chopped
Salt & pepper to taste
Pinch of hot pepper flakes
Optional: extra virgin olive oil applied in mist form

Equipment:
Meat pounder or tenderizer
Optional: spray mister
Heavy Duty plastic wrap
1 metal baking sheet

To make the bread crumbs, cut the bread into roughly 1 inch cubes.  Put them in a food processor and pulse to the desired level of fineness, ensuring they are somewhat uniform in size.  Place the crumbs in a bowl big enough to dredge the chicken pieces in and mix in the herbs, hot pepper, and salt and pepper to taste.  

Preheat an oven to 400° F with the rack in the upper middle.   

Lay a thigh out on a double layer of plastic wrap on a work surface that you can thoroughly clean later.  Place another double layer of plastic on top, and using the textured edge of the meat pounder, whack the chicken, not too energetically, going in a circular motion from the inside out, until it's a uniform thickness of about a 1/4 inch.  Set aside and repeat for all the pieces.  Alternatively you can use a tenderizer with spears and run over each side of the chicken twice in opposite directions.  Season to taste them all with salt and pepper.

Put the olive oil in a bowl that's also big enough to dredge the chicken in.  Prepare your assembly line; chicken, then oil, then crumbs, then baking sheet.  Dip the chicken in the oil to coat the entire surface, then drain off the excess.  Press firmly into the breadcrumbs, turning to coat fully and evenly.  The crumbs may not adhere that strongly at first, but by pressing firmly and then placing them gently on the baking sheet you'll be ok.

When all the pieces are coated, bake them for 20 minutes, checking midway to see how brown the bottom is, flipping if necessary.  If you desire them more brown after 20 minutes, turn the broiler on and broil them for 1 to 2 minutes, paying careful attention so the breading doesn't burn. 

Thursday, April 28, 2011

HomeFood, Stratford, CT: Fettuccine con Ragu Finto


Before I knew about Homefood, I read an article in the New York Times several years ago about how people in Palermo have opened eating establishments in their houses (not entirely legal, but not offensive enough to warrant government intervention), their dining rooms spilling out onto the sidewalks of the city, allowing hungry people to walk in and enjoy a sampling of local cuisine, basically whatever the owner decides to put on the menu for that day.

Having my buddy over recently for a sort of short notice dinner made me think how nice it would be, maybe in simpler times, to have an informal establishment of my own that would welcome people in to dine on whatever offerings I thought of on a given day.  Not a full fledged restaurant with all its liabilities and constraints, just a little lunch spot like Louis' Lunch or something, albeit with more spontaneity, at least in the beginning.      

When Asher asked for some tagliatelle if I was up for it on a Sunday evening, the gears started cranking and this recipe is what I came up with.  Since he keeps kosher, the easiest option was to stay vegetarian. 

It's Spring now, but the weather wasn't exactly harbinger-ing Summer's warm breezes prior to this week, so I wanted to highlight some of the sweet green sprouting things of the moment but also stay hearty and satisfying for a one dish meal.  

Ragu Finto describes the application of mushrooms in this case, ground up prior to cooking to resemble in appearance and texture a meat sauce.  Never too liquidy when I'm at the helm, the sauce coats the strands of fresh pasta kind of like a thick pesto, but it's cooked and reduced some, so I think it qualifies as a sauce or ragu.    

To make the pestata or pasty base for the ragu I processed the onion, celery and garlic just as I would later do for the shrooms into tiny bits to make it homogeneous (leave a couple mushrooms just diced for the fun of it).  With some red wine and Thai fish sauce (just a tad) substituting salted anchovies, the end product had depth of flavor and earthiness that I thought would do well to support a final garnish of truffle oil, the inclusion of which Asher requested.  Anchovies or fish sauce you ask?  Why, yes...not to impart fishiness to it, just to add a curious element of flavor and salinity that you will appreciate but not easily discern as coming from the sea. 

To bring Spring into the fold, I cut the tips off asparagus and threw them in to just cook through in the ragu for a few minutes before plating.  I took the remaining portion of the asparagus and very thinly sliced them, mixing in at the last second without cooking because I wanted that raw sweetness and crunch against the woodsy sauce.  Some more fresh pop from parsley, along with Parmigiano Reggiano and truffle oil, and I think we hit most or all of the notes. 

We currently have seating for 6 and reservations 4 hours or more in advance are greatly appreciated...

Serves 4

Ingredients:
2 1/2 - 3 lbs. mushrooms (your choice, but try to mix in some more flavorful ones and even some dried)
1 bunch of asparagus
1 medium onion
2 cloves garlic
2 ribs celery
1 cup red wine (nothing too fruity)
3 tablespoons extra virgin olive oil
Pinch or two of hot pepper flakes
2 anchovy fillets, rinsed well, or 2 teaspoons Asian fish sauce
Optional: 1/2 cup light cream
Optional: 1 cup meat, chicken or vegetable stock
Salt & pepper to taste
Handful of fresh parsley, finely chopped
Parmigiano Reggiano to garnish
Optional: fresh truffle or truffle oil for garnish

1 recipe fresh egg pasta cut to fettuccine or tagliatelle, recipe follows

Pulse all the mushrooms, save a handful, until they are finely minced and set aside.  Dice the handful into 1/2" pieces.  Then process the onion, celery and garlic until it becomes almost a paste.  Heat the olive oil on medium and when it shimmers add the onion, celery and garlic and cook, letting the considerable liquid sweat out, 10-12 minutes.  When the onions begin to brown, add the mushrooms and turn the heat to high.  Cook, stirring occasionally, until the mushrooms have released most of their liquid, 15-20 minutes.  


Add the red wine a cup at a time and let it mostly evaporate.  Add the cream, then add the anchovies or fish sauce, the pepper flakes and some water or stock and bring to a boil, then reduce to a simmer and cook, stirring occasionally and adding ladles of liquid to keep it from getting too dry, for about 40 minutes. 

In the meantime, cut the tough ends off the asparagus and remove the tips, setting them aside.  Take the stalks and slice very thin, using a mandolin if you prefer.  When the sauce has finished cooking, season to taste with salt and pepper, turn off the heat and add the tips of the asparagus. 


To finish the dish, cook the pasta 2-4 minutes in salted water, then drain and toss with some of the ragu in a bowl or frying pan, adding pasta water if need be to make it adhere well to the noodles.  Serve with Parmigiano Reggiano, parsley and some thinly sliced truffle or truffle oil for us wannabes.

Egg pasta for 4:
4 jumbo eggs
400 grams or about 3 1/2 cups 00 or AP flour

1 tablespoon extra virgin olive oil

Mound the flour on a work surface and make a well about 8 inches in diameter.  Add the eggs to the well and scramble with a fork, then add the oil.  Using the fork incorporate the flour from the inner walls into the egg.  Be careful not to break the wall and lose the eggs before you have a fairly well composed mass of dough.  Put the fork aside when most of the wet and dry are mixed and form a rough ball.

Knead the dough for 8 to 12 minutes, adding flour conservatively if it's very wet and resting periodically, until the dough stretches and is supple and smooth.  Wrap it in plastic and let rest 20 to 30 minutes.

To make the tagliatelle or fettuccine, using a pasta roller or rolling pin roll out segments of dough until it's thin enough for light to pass through.  Cut it into a rectangle that's 10 inches long on one side (that'll be the length of the noodles).  Lightly flour the dough if it's sticky and roll it over itself from bottom to top.  Then take a knife and cut every 1/4 inch or thereabouts and unravel the noodles.  Alternatively, follow instructions for a pasta machine or attachment.  
Form the noodles into little nests of about a serving apiece.  Lightly flour with semolina or cornmeal.  Freeze it if you don't place on using it immediately.  To cook it later do not thaw--go from freezer to boiling water.